
Setting up Incoming Connections
Switching the Connection On and Off
One way to connect the Dreamcast to a Windows 2000/XP PC is through so-called Incoming Connections. You do not need a Server edition of Windows to do this; it can be done with either the Home or Professional editions just as well.
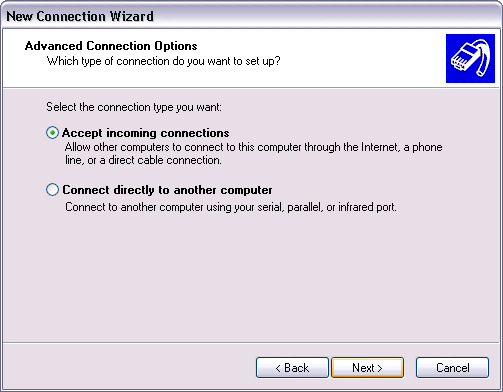
The first thing you need to do is start up the New Connection Wizard. This can be found in the Start Menu under Settings/Network Connections. At the first choice it gives you, select "Set up an advanced connection".
Next, choose "Accept incoming connections".
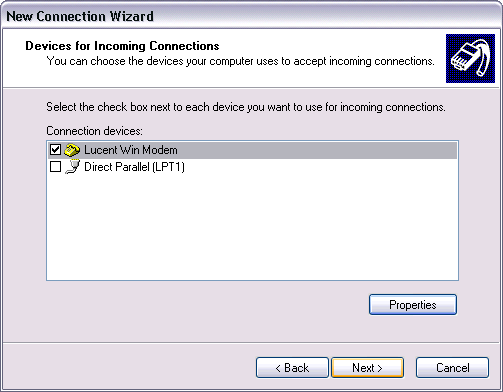
After you select incoming connections, a list of compatible devices should pop up. Make sure the modem you want to use is checked, and hit Next.
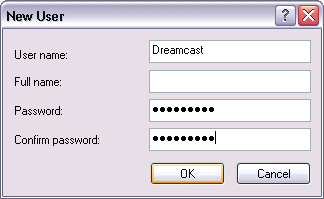
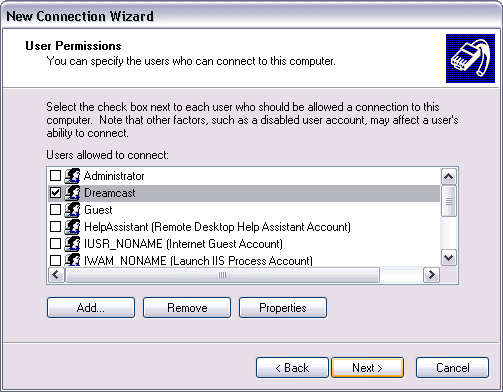
After that it will ask you if you want to accept Virtual Private Network connections. Just say no and continue to the next dialog, User Permissions. Here you will need to add an account for the Dreamcast, so click Add. Type in a user name and password for the account and click Ok. Then just make sure it's checked in the User Permissions dialog box, and click Next.
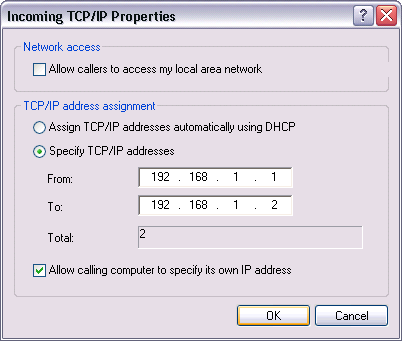
In the last dialog box, make sure TCP/IP is enabled, click on it and edit the properties as shown below. Then hit Next, and then Finish. Now you have Windows setup to accept calls from your Dreamcast.
Switching the Connection On and Off
You will be turning this connection on and off through the Incoming Connections Properties dialog box. You can find it in the Start Menu under Settings/Network Connections after you set it up by following the instructions above.
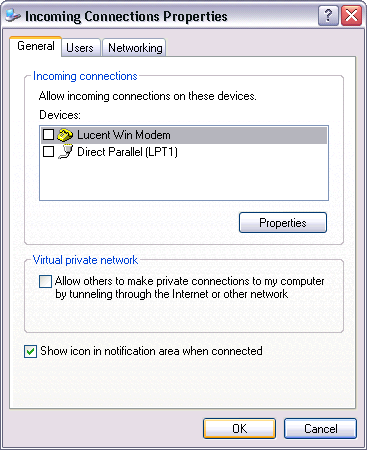
Just set the checkbox next to your modem and hit OK to cause Windows to pick up the line. Clear the checkbox and hit Ok to disconnect. Simple enough.